BRICS Log in is switching to Researcher Auth Service (RAS)
The traditional username/password Log in flow for BRICS will soon be replaced by NIH’s Researcher Auth Service (RAS). This change will require all users to follow a set of steps to log in/sign up for RAS and link your BRICS account to your RAS account. RAS supports these identity providers, NIH PIV/CAC card, or an account with Login.gov.
Users with an NIH/HHS account should use their NIH PIV/CAC card as the identity provider when logging in with RAS. Users without an NIH/HHS account will need to use Login.gov. If the user does not already have a Login.gov account, they will need to create one and then select Login.gov as the identity provider when logging in with RAS.
Click here to learn more about Researcher Auth Service (RAS)
1.1 Existing user Log in with a NIH PIV/CAC card
For current users with a NIH PIV/CAC card, please follow these steps:
1. Navigate to your BRICS instance and select Log in.
2. Here you will see the new Log in page. Should you have a NIH PIV/CAC card, it is preferred to Log in with it. Click the “Log In with RAS” button and continue to the next step.
If you do not have a PIV card you will need to follow the steps in Existing user Log in with Login.gov
NOTE: BRICS will no longer be handling your Log in credentials. For assistance with your account credentials follow steps:
- a. Forgot Login.gov password: https://secure.login.gov/users/password/new
- b. Forgot NIH PIV credentials: https://auth.nih.gov/CertAuthV3/forms/mfa/Help.html

3. After clicking with “Log In” you will be taken to the following page. Select PIV/Smart Card.
- a. If you are unable to sign in with your PIV card, then you may sign in using the Authenticator App instead.

4. Provide your NIH PIV/CAC card authentication by selecting the appropriate certificate and provide your PIN:

5. After logging into the system for the first-time using RAS, the user will be taken to the following page to link their account. If you have an account continue by selecting "Search for Existing Account".

6. Enter your email/username of your BRICS account you wish to link:

7. Verify your account by going to the email account associated to your BRICS account and clicking the verify account ownership link. If you do not see your email, please do the following:
- a. Wait for the email to be received.
- b. Check your spam folder for the email.
- c. Resend the verification email using the "Resend Verification Email" button.
- d. Ensure you have entered your email/username correctly in step 6.
- e. Contact your operations team for any additional help.

8. Congratulations! Your account should now be successfully linked, and you can continue to your BRICS workspace.

9. You may be redirected to the E-signature page if you have not submitted your e-signature before. NOTE: Submission of your E-Signature is required to access your BRICS instance.

1.2 Existing user Log in with a Login.gov
1. Navigate to your BRICS instance and select Log in.
2. Here you will see the new Log in page. If you have a NIH PIV/CAC card it is recommended to Log in with it by following steps in Existing user Log in with a NIH PIV/CAC card.
To continue logging in with Login.gov select the "Create a Login.gov Account" button.
NOTE: BRICS will no longer be handling your Log in credentials. For assistance with your account credentials follow steps:
- a. Forgot Login.gov password: https://secure.login.gov/users/password/new
- b. Forgot PIV credentials: https://auth.nih.gov/CertAuthV3/forms/mfa/Help.html
3. Create your Login.gov account with your desired email. Afterwards check your email to verify and finish creating your Login.gov account.


4. After creating and verifying your Login.gov account, navigate back to your BRICS instance Log in page and select "Log In".

5. Select "Login.gov"

6. Enter your Login.gov credentials and select Sign In:

7. When first authentication through Login.gov, you will need to Grant permission to BRICS to have access to your basic profile information.

8. After logging into the system for the first-time using RAS, the user will be taken to the following page to link their account. If you have an account continue by selecting "Search for Existing Account".
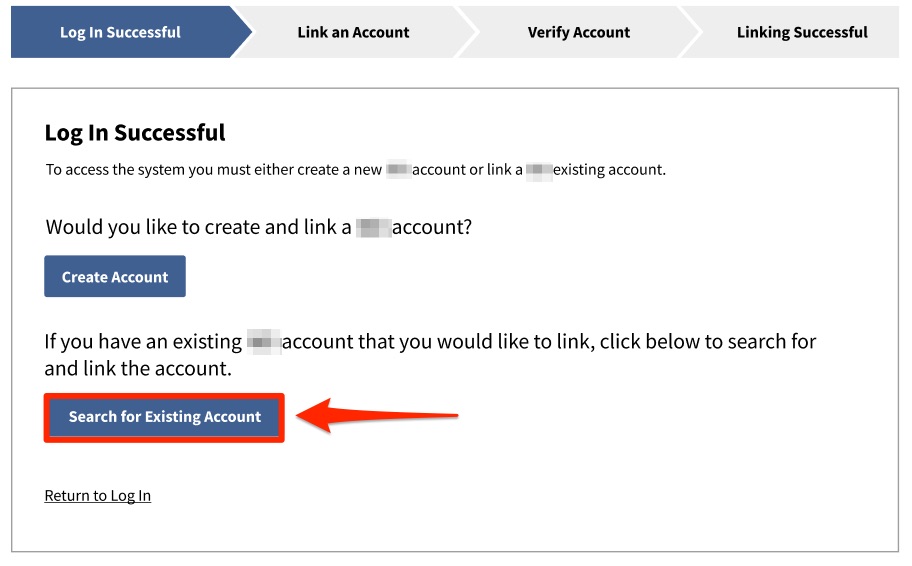
9. Enter your email/username of your BRICS account you wish to link
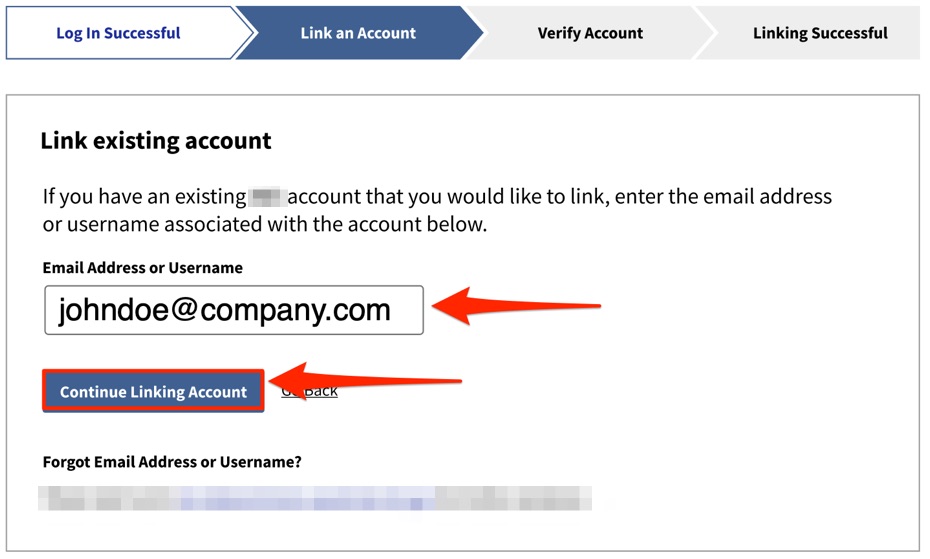
10. Verify your account by going to the email account associated to your BRICS account and clicking the verify account ownership link. If you do not see your email, please do the following:
- a. Wait for the email to be received.
- b. Check your spam folder for the email.
- c. Resend the verification email using the "Resend Verification Email" button.
- d. Ensure you have entered your email/username correctly in step 6.
- e. Contact your operations team for any additional help.
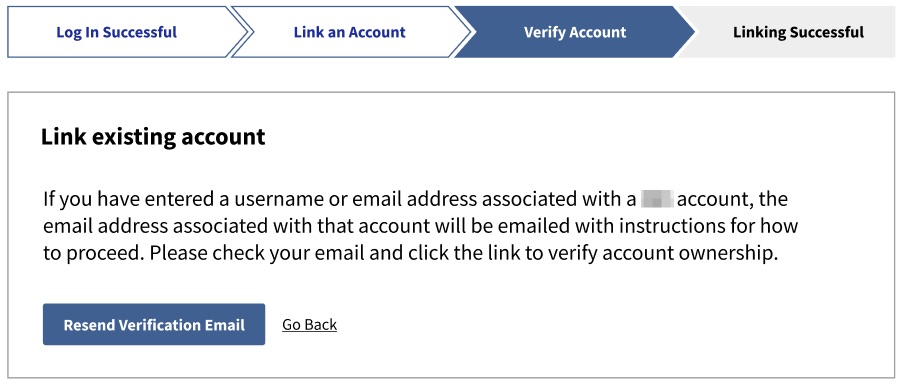
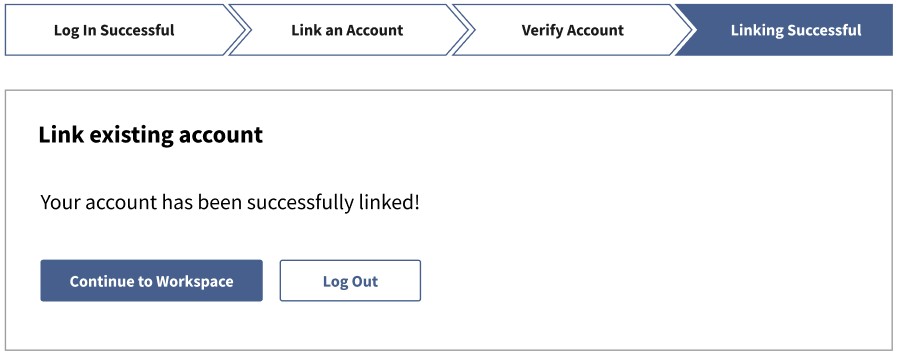
11. Congratulations! Your account should now be successfully linked, and you can continue to your BRICS workspace.
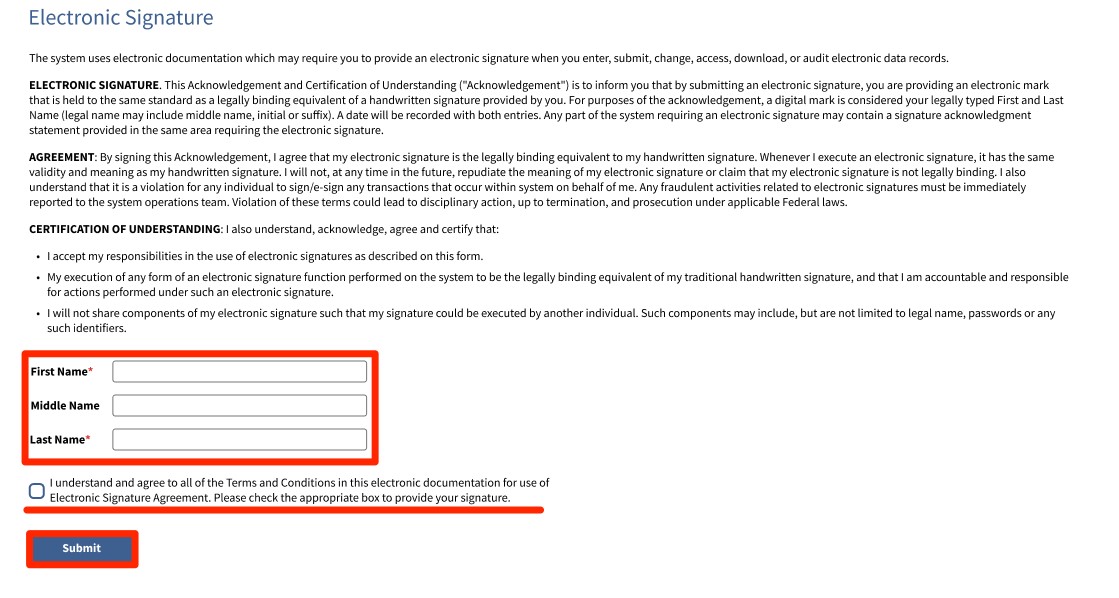
12. You may be redirected to the E-signature page if you have not submitted your e-signature before.
NOTE: Submission of your E-Signature is required to access your BRICS instance.
2.1 New user Log in with a NIH PIV/CAC card
For current users with a NIH PIV/CAC card, please follow these steps:
1. Navigate to your BRICS instance and select Log in.
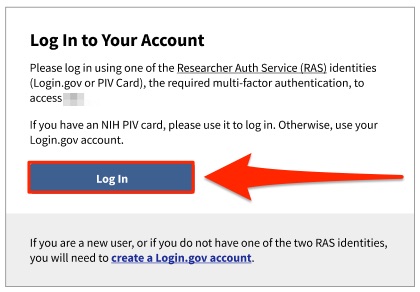
2. Here you will see the new Log in page. Should you have a PIV card, it is preferred to Log in with it. Click the "Log In" button and continue to the next step. However, if you do not have a PIV card you will need to click "create a Login.gov account" and follow the steps in New user Log in with Login.gov
3. After clicking "Log In" you will be taken to the following page. Select PIV/Smart Card.
- a. If you are unable to sign in with your PIV card, then you may sign in using the Authenticator App instead.

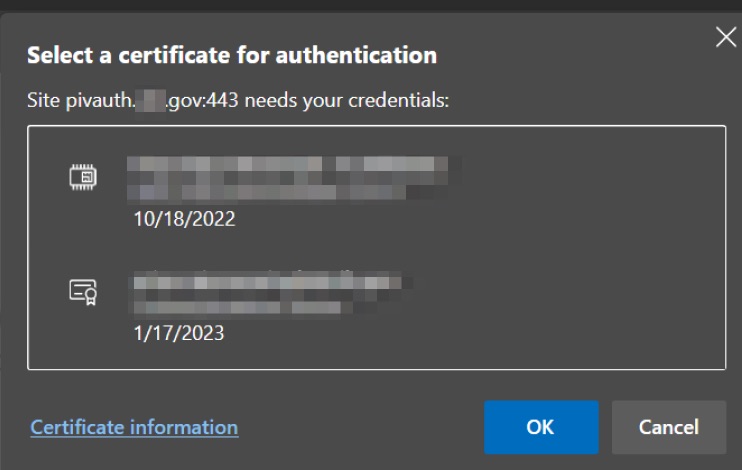
4. Provide your NIH PIV/CAC card authentication by selecting the appropriate certificate and provide the PIN:
5. After logging in using RAS. You will see the following screen. Select the "Create Account" button to create a new account.

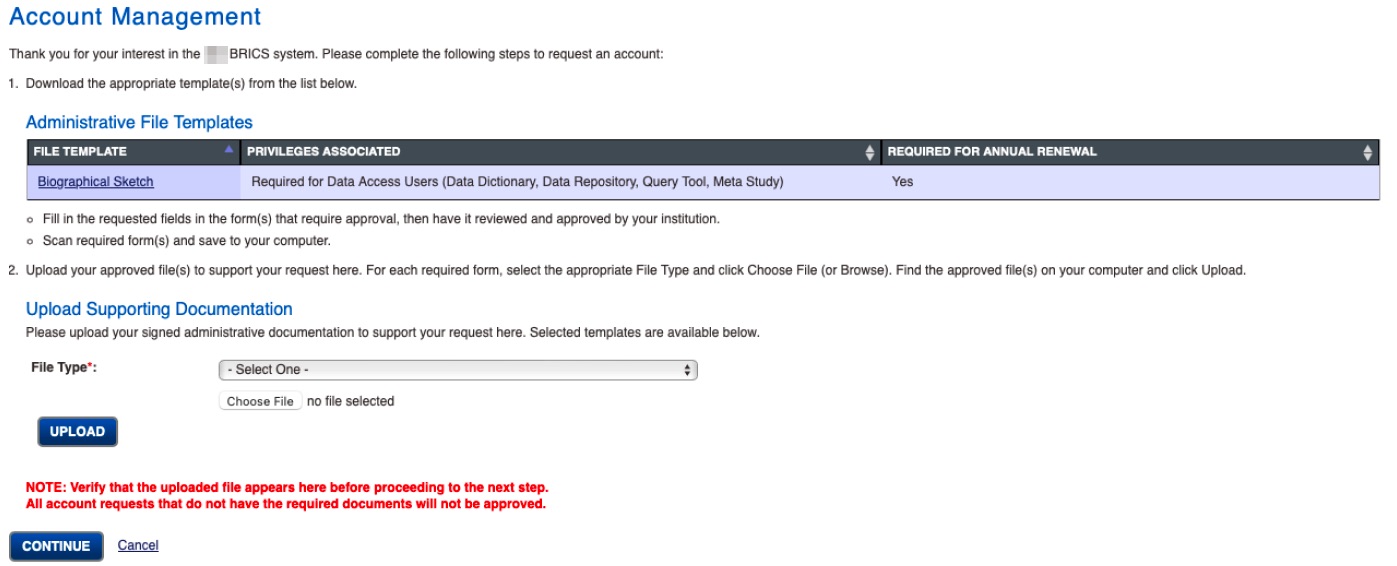
6. The account management page will load where you will need to upload supporting documentation for your BRICS account. After an account request you will need to wait until your account is approved to get access to the BRICS instance. Users will have access to the account management module before approval and may log back in to upload additional supporting documentation at any time.

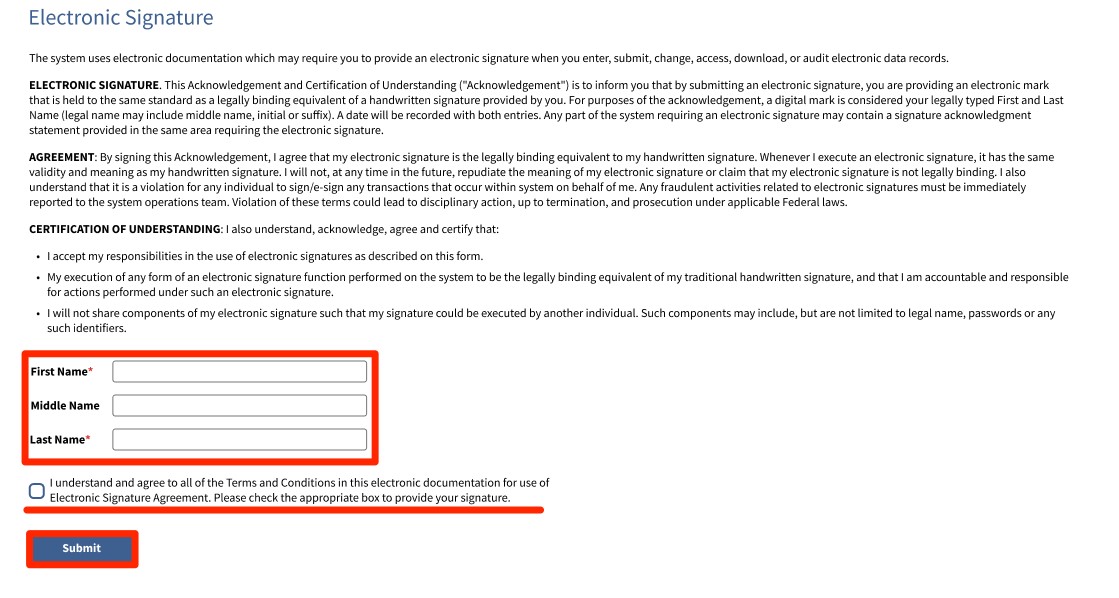
7. On your first Log in to your BRICS instance, you will be prompted with an E-signature page. NOTE: Submission of your E-Signature is required to access your BRICS instance.
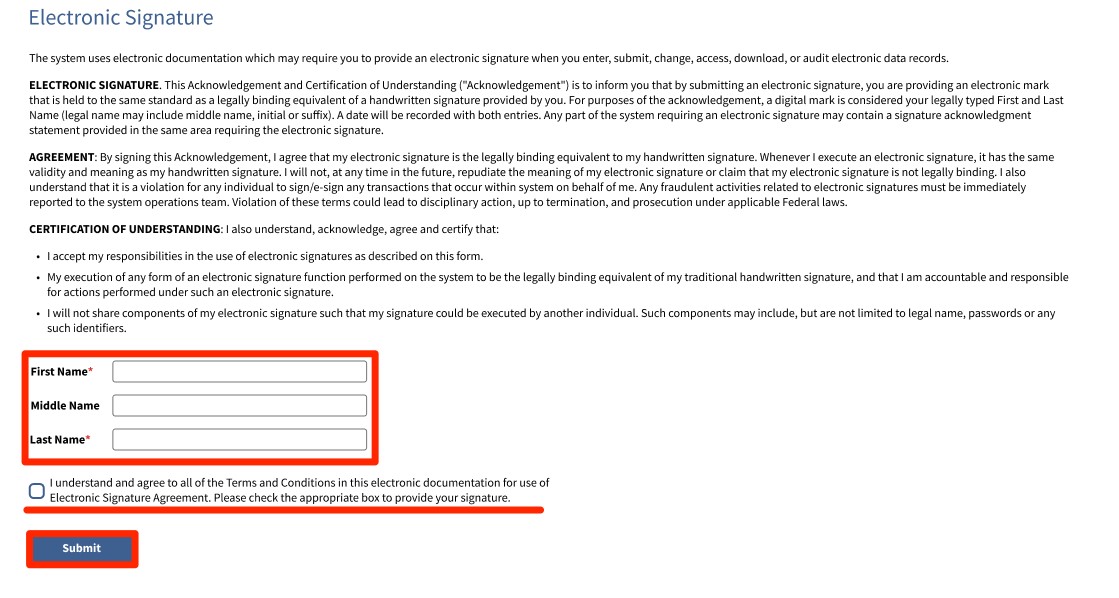
2.2 New user Log in with Login.gov
1. Navigate to your BRICS instance and select Log in.
2. Here you will see the new Log in page. If you have a NIH PIV/CAC card it is recommended to Log in with it. Please follow steps in New user Log in with a NIH PIV/CAC card. If you do not have a PIV card select the "create a Login.gov account" button and continue to the next step

3. Create your Login.gov account with your desired email. Afterwards check your email to verify and finish creating your Login.gov account.
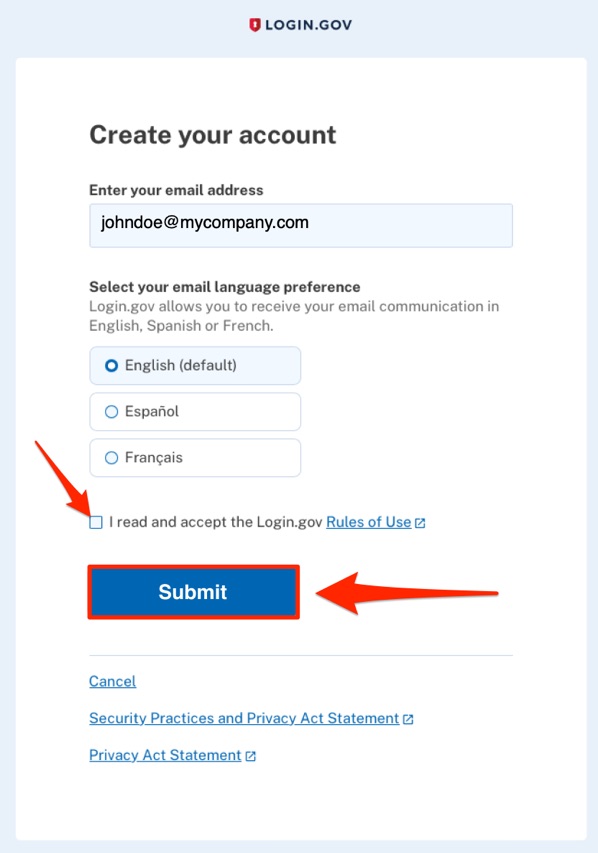
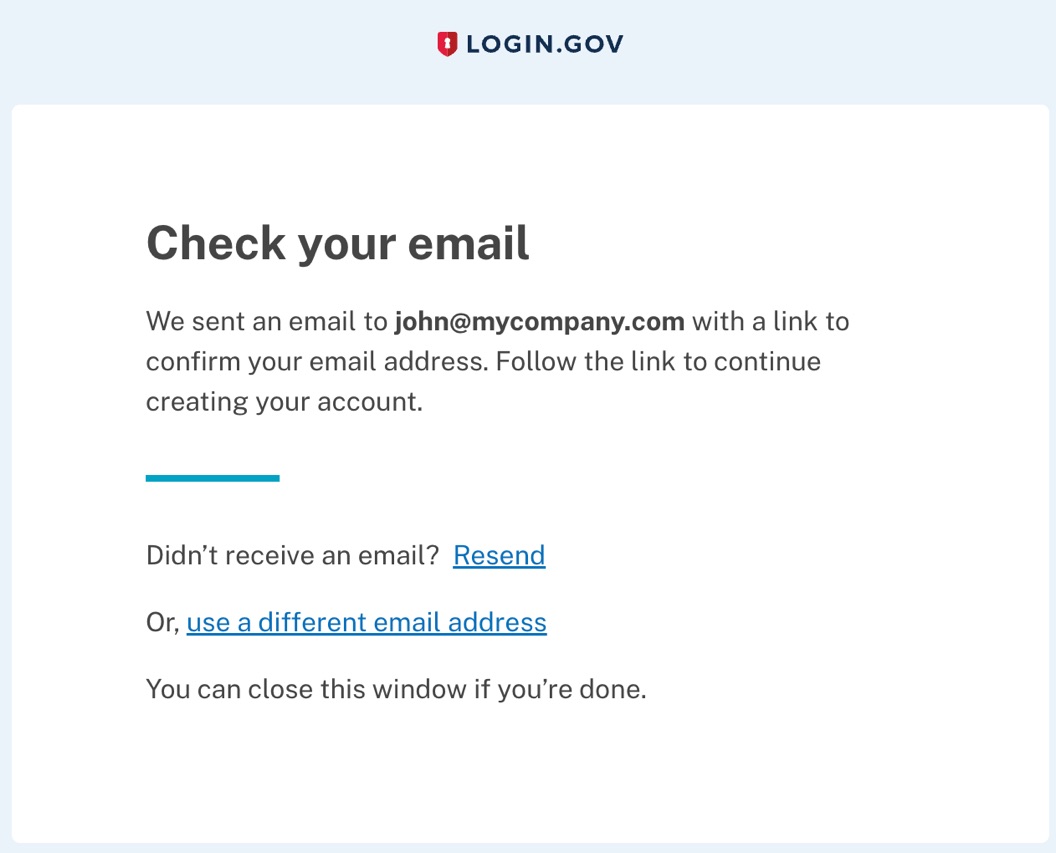
4. After creating and verifying your Login.gov account, navigate back to your BRICS instance Log in page and select "Log In".
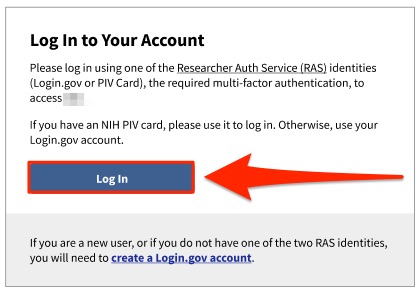
5. Select "Login.gov"
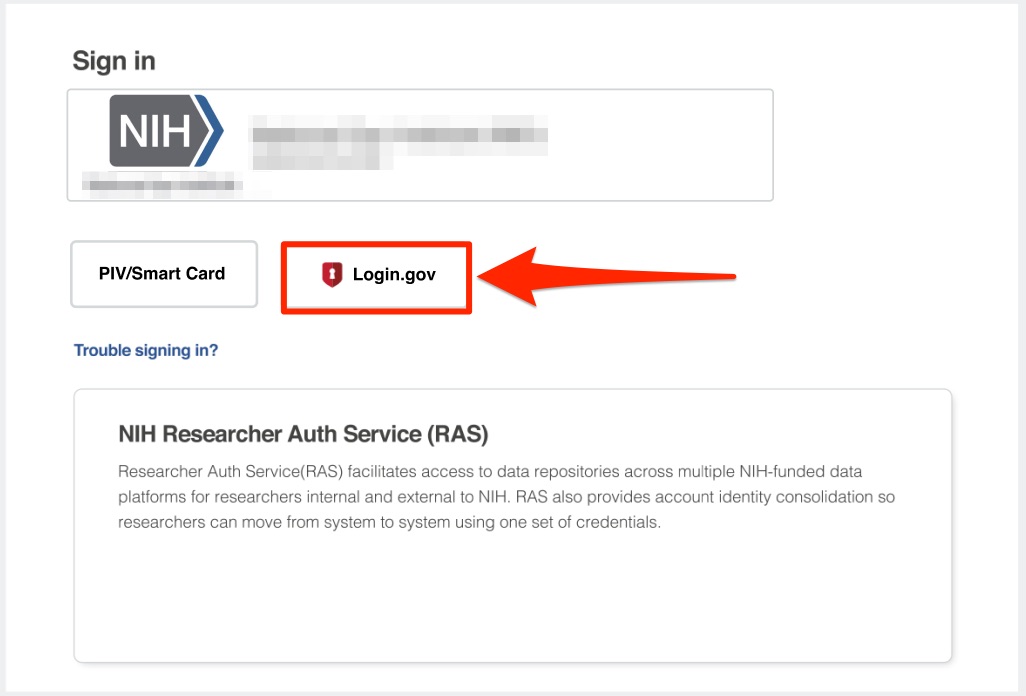
6. Enter your Login.gov credentials and select Sign In:
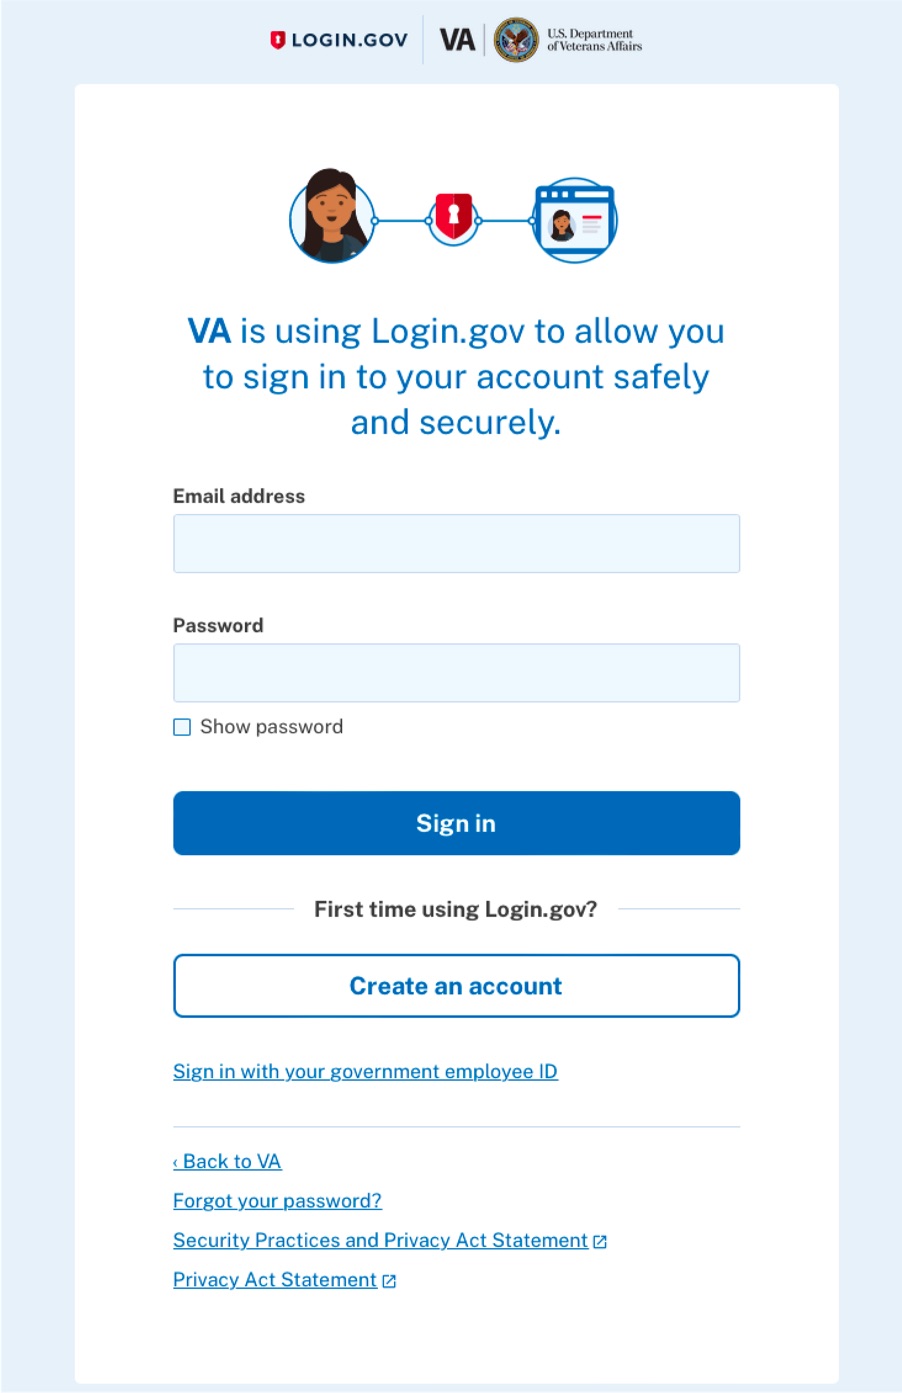
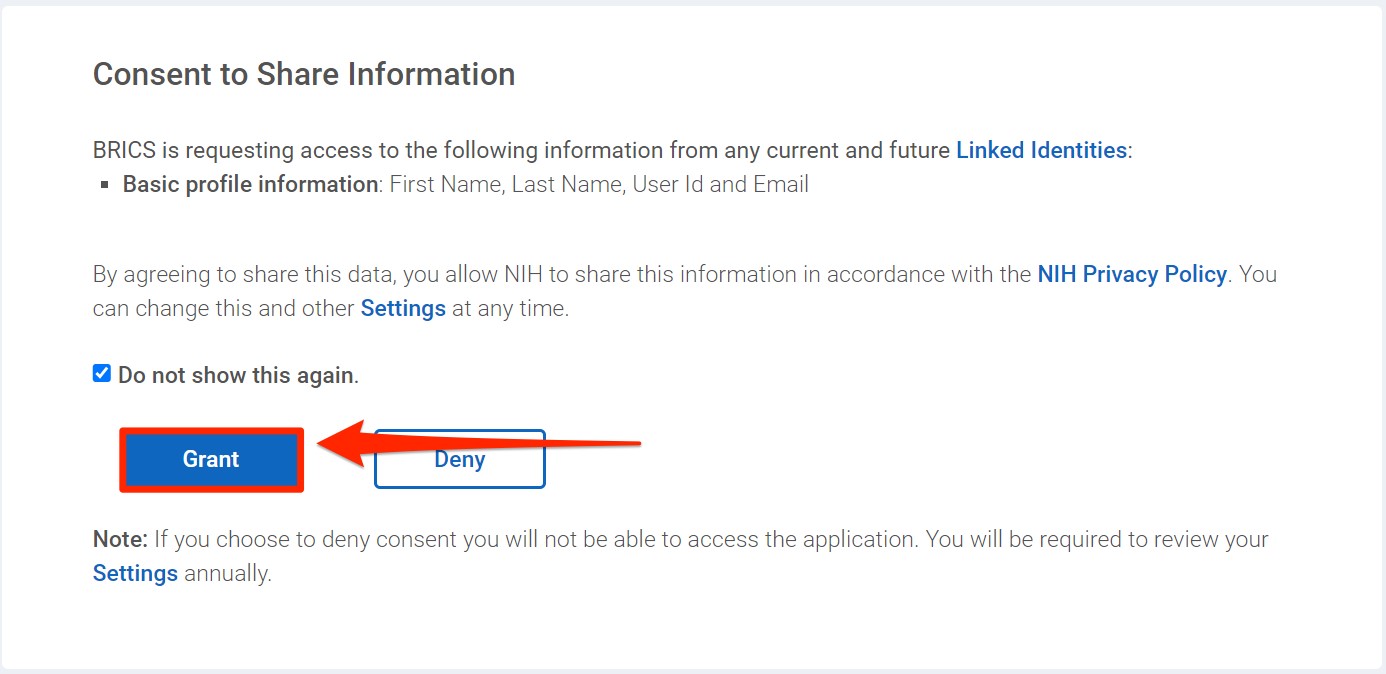
7. When first authentication through Login.gov, you will need to Grant permission to BRICS to have access to your basic profile information.
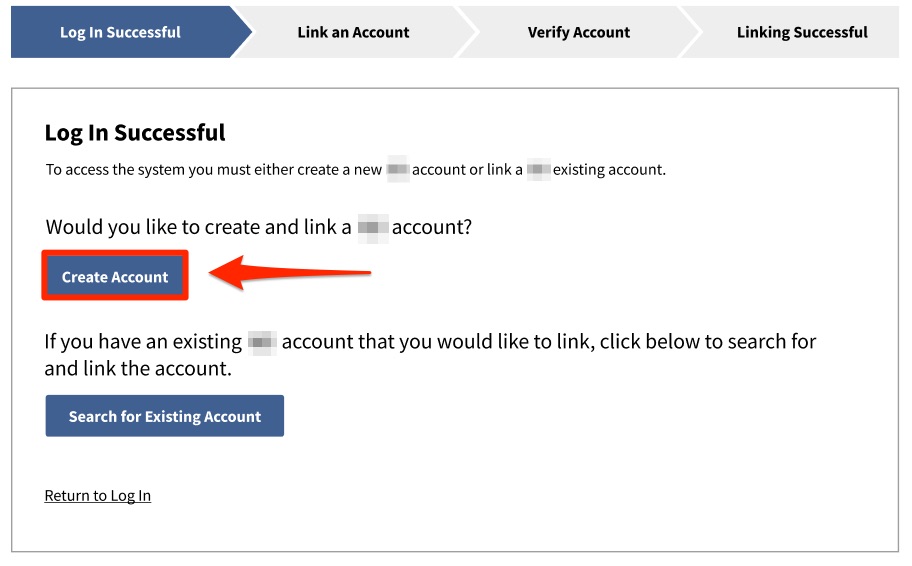
8. After logging in using RAS. You will see the following screen. To create a new account select the "Create Account" button.
9. The account management page will load where you will need to upload supporting documentation for your BRICS account. After an account request you will need to wait until your account is approved to get access to the BRICS instance. Users will have access to the account management module before approval and may log back in to upload additional supporting documentation at any time.
10. On your first Log in to your BRICS instance, you will be prompted with an E-signature page. NOTE: Submission of your E-Signature is required to access your BRICS instance.
3.1 Logging out of your BRICS account and/or your RAS account.
1. When logged into your BRICS account, you will see a logout dropdown at the top right of the page.

2. Should you wish to stay logged into other applications using RAS you may choose to only log out of your BRICS instance. If you wish to logout of all RAS applications you are currently signed into, select Log out of RAS.

3.2 API token
The API token serves as your identity and access control to the entire system. This token is similar to a password and should be protected as such. The token updates every ~30 minutes minimum, on every login, and every session update.
Previously the API token was retrieved by making a request to /auth/login with the user’s username/password. However, this has now changed:
For users to retrieve/refresh the API token, they will need to log into BRICS and navigate to the Account Management module. The “My Profile” page will load, and the API token can be accessed from there.

1. Help with RAS log in credential issues:
- a. Link to Login.gov password recovery: https://secure.login.gov/users/password/new
- b. Link for NIH PIV card issues:https://auth.nih.gov/CertAuthV3/forms/mfa/Help.html
2. General Information on NIH Researcher Auth Service: https://datascience.nih.gov/researcher-auth-service-initiative
